
Page update: Wed 22 Oct 2025 18:44:00 UTC
While the SatNOGS client is migrating to a docket based solution I can imagine that some still want to use a legacy install method. I have updated this page with information to install and configure the SatNOGS legacy client.
First page published: Sat 09 Apr 2022 15:18:41 UTC
For the people who don’t want to build a Raspberry Pi SatNOGS ground station, or have a old computer or laptop lying around there is the possibility to get similar functionality if you use Debian as a distribution.
You need to install Debian Bullseye as a bases and can then be used for adding the SatNOGS ground station software. This doesn’t mean others can be used but then you need to build everything from source. This won’t be part of the information shared on this page.
The following installation steps can be used to install it on the following hardware:
- Intel 32 bits processors. (This will end in the near future)
- Intel 64 bits processors (The preferred method)
- Generic hardware requirements: 2 to 4 Gb of memory and 16 – 32 Gb of disk space.
This page won’t describe the Debian installation, there are already enough examples that can be found on the internet. I do want to urge you to do an minimal installation, this will be a dedicated SatNOGS ground station and not a Linux Desktop.
SatNOGS specific choices during the installation:
- Language: Select English
- Location: The one that applies to you.
- Locales: en_US.UTF-8
- Keyboard: The one that applies to you.
- Hostname: gs-satnogs.
- Domain name: Leave empty.
- Root password: Your secret password
- New user: lab (Don’t use the username satnogs)
- Disk: Guided – use entire disk
- Partition disk: All files in one partition.
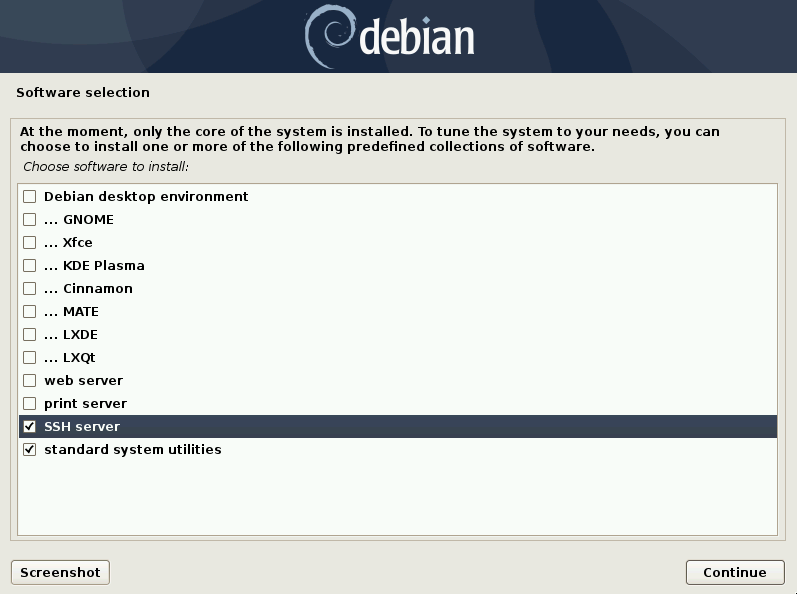
- Software selection: See image
When all this is done reboot the system and login as the new user you created, in my case the user lab. Now lets check a couple settings and packages. (Don’t install the software as root.)

For a successful SatNOGS ground station installation we will need a program called sudo and the user lab needs to be part of the sudo group.
After a successful install, run the command id
lab@gs-satnogs:~$ id
uid=1000(lab) gid=1000(lab) groups=1000(lab),24(cdrom),25(floppy),29(audio),30(dip),44(video),46(plugdev),109(netdev),111(bluetooth)
Run the following command to install sudo and add lab to the group sudo.
lab@gs-satnogs:~$ su -
(enter the root password)
lab@gs-satnogs:~# apt-get install sudo
lab@gs-satnogs:~# usermod -a -G sudo lab
lab@gs-satnogs:~# exit
lab@gs-satnogs:~$ exit
After this logout, login again and check if you are member of the group sudo, by running id again. If you are member of the groud sudo we can start with the installation of the SatNOGS software.
An important dependency is the correct ansible version and needs to be installed from the public ansible repository, otherwise the satnogs-client-ansible installation will fail.
Add ansible repository and install ansible package:

/etc/apt/sources.list.d/ansible.list
deb http://ppa.launchpad.net/ansible/ansible/ubuntu focal main

Add ansible trusted key:

sudo apt-key adv --keyserver keyserver.ubuntu.com --recv-keys 93C4A3FD7BB9C367

Add support ansible version.

sudo apt-get update
sudo apt-get install ansible ansible-core
We are still logged in and we will start running some commands.
lab@gs-satnogs:~$ sudo apt-get update
(enter the lab users password)
lab@gs-satnogs:~$ sudo apt-get upgrade
lab@gs-satnogs:~$ sudo apt-get install ansible git sshpass python-setuptools
lab@gs-satnogs:~$ mkdir git
lab@gs-satnogs:~$ cd git
lab@gs-satnogs:~$ git clone https://gitlab.com/librespacefoundation/satnogs/satnogs-client-ansible.git
lab@gs-satnogs:~$ cd satnogs-client-ansible
lab@gs-satnogs:~$ git checkout oldstable
lab@gs-satnogs:~$ cp -r production.dist production
lab@gs-satnogs:~$ vi production/inventory/hosts
Basically this step wants you to edit the file production/inventory/hosts so if you are more experienced with another editor that is also fine. We need to update this file with your own target host gs-satnogs, lab and his password.

The ansible-playbook has a dependence with ${HOME}/.ssh/known_hosts therefor we need to add this entry to the file with the following command.
lab@gs-satnogs:~$ ssh lab@gs-satnogs true
(Select yes and enter the lab users password)
lab@gs-satnogs:~$ ansible-playbook -i production/inventory/hosts -K site.yml
(enter the lab users password)
This step will take some time, it will install all the SatNOGS software and configure all the settings that need to be made.
When all is done and successful you will see a similar output as shown in the image below.

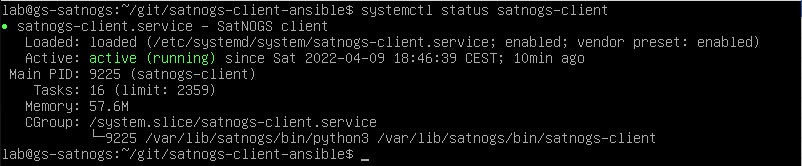
To see if the SatNOGS client is running successfull we can do some final checks.
lab@gs-satnogs:~$ sudo systemctl status satnogs-client
Next Steps:
Now follow the SatNOGS Client Setup link to configure your station after this successful installation.
Active stations using this setup:
SatNOGS ground station 431 and 2176
References:
For the creation of the images a Virtualbox installation is used, to have the best ground station experience, don’t use it as a live system.
SatNOGS debian ansible installation.
SatNOGS Linux Desktop installation.